Intro series · Article 3 of 4
How You Tell Cloudburst What's Allowed: NodePools, NodeClasses, and NodeClaims
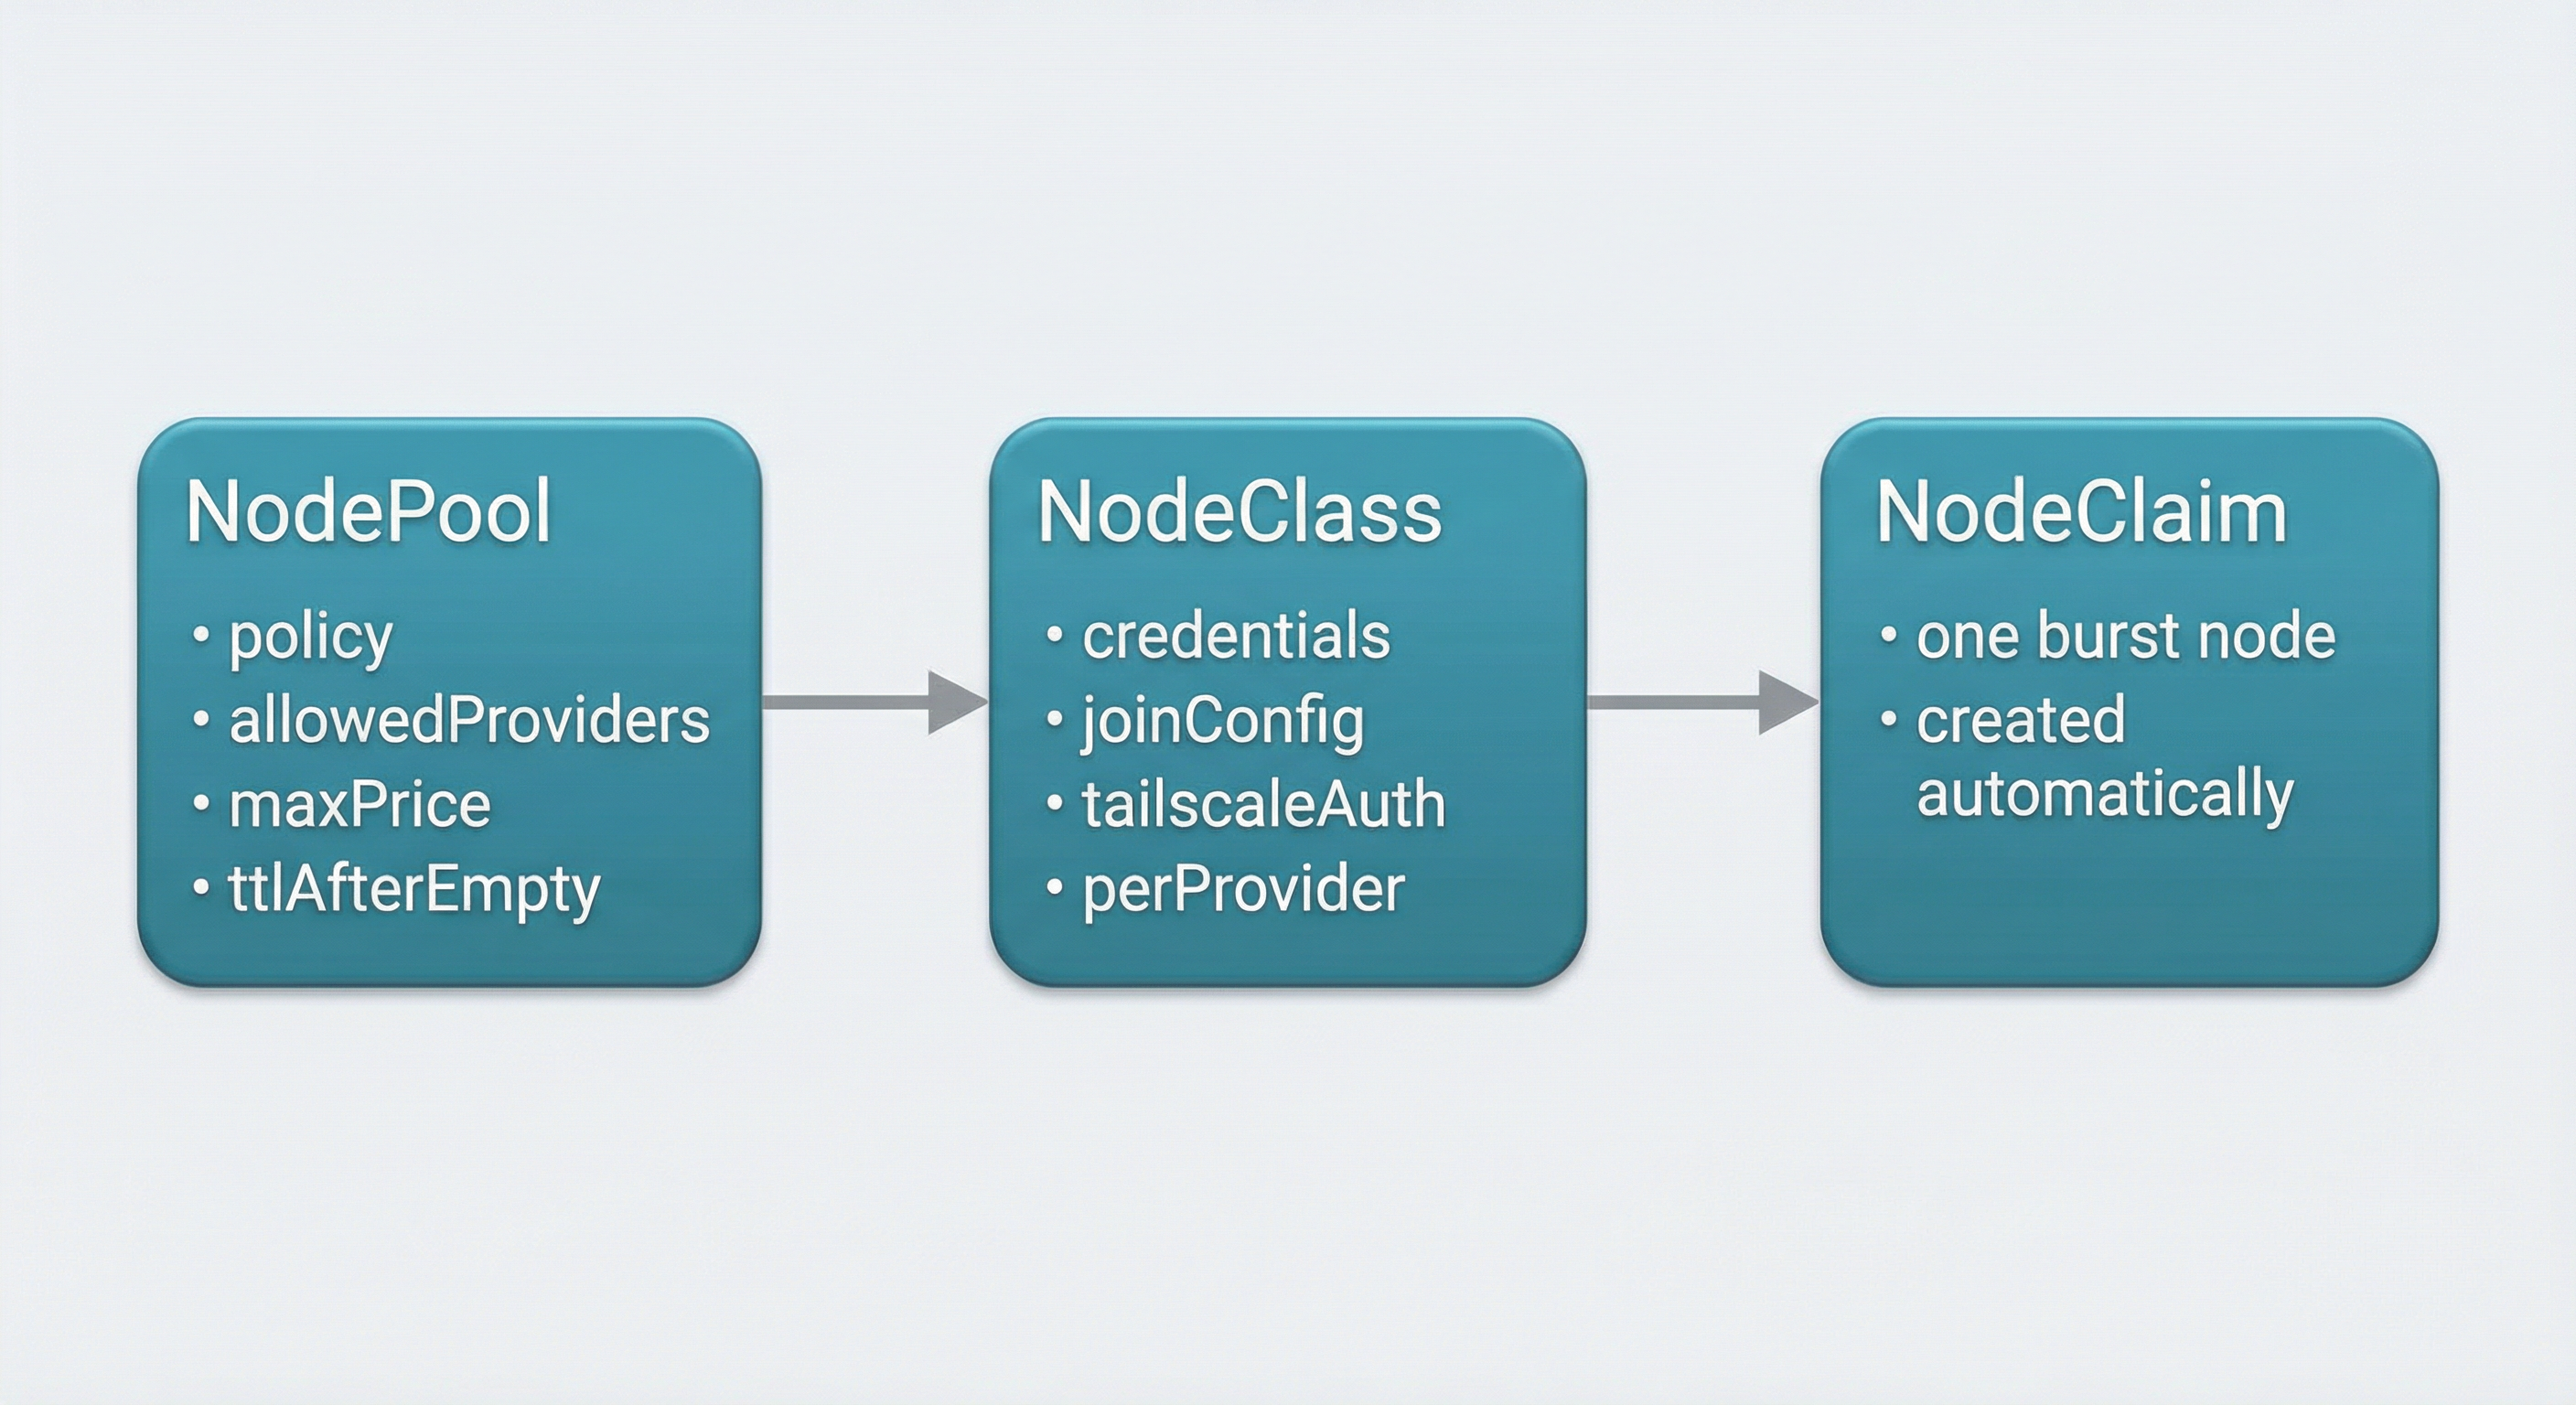
The interface: NodePool, NodeClass, NodeClaim.
Cloudburst Autoscaler doesn't guess what clouds you use or how much you're willing to pay. You tell it via two kinds of resources: NodePool (scaling policy — which providers, max price, min/max nodes, how long an empty node can sit before it's removed) and NodeClass (per-provider configuration: credentials, region/zone, join config, Tailscale auth). The system then creates a third resource, NodeClaim, for each burst node. You don't create those by hand. One NodeClaim = one VM from creation to deletion.
NodePool
NodePool is the user-facing policy. It answers "under what rules can the system add capacity?"
In the requirements section you define instance constraints. Architecture: usually x86_64 or arm64. Max price per hour in EUR — no recommendation will exceed this. Allowed providers: the list of clouds the Autoscaler is allowed to use. This list is sent straight to CloudBroker. If you set ["hetzner", "scaleway"], CloudBroker only considers those two; the Autoscaler will only ever provision on Hetzner or Scaleway. You can also set an optional region constraint (e.g. "EU only") so CloudBroker restricts to EU regions.
Limits define how big the burst can get. Max nodes: cap on how many burst nodes can exist at once. Min nodes: floor (often zero for pure burst).
Disruption controls scale-down. ttlSecondsAfterEmpty: how long a node can sit with no workloads before the controller deletes it. ttlSecondsUntilExpired: optional max lifetime; after that the node is removed regardless of occupancy. That avoids "forgotten" long-lived burst nodes.
Template is where you set labels (and optionally taints) that will be applied to every provisioned node. Pods can then target those labels if you want burst capacity for specific workloads.
NodePool never names a specific VM. It says: "I'm willing to burst to these providers under these rules." The actual choice is CloudBroker's.
Example NodePool (Scaleway, EU, max €0.15/h, scale to zero):
apiVersion: cloudburst.io/v1alpha1
kind: NodePool
metadata:
  name: scaleway-nodepool
  namespace: default
spec:
  requirements:
    regionConstraint: "EU"
    arch: ["x86_64"]
    maxPriceEurPerHour: 0.15
    allowedProviders: ["scaleway"]
  limits:
    maxNodes: 3
    minNodes: 0
  template:
    labels:
      cloudburst.io/nodepool: "scaleway-nodepool"
      cloudburst.io/provider: "scaleway"
  disruption:
    ttlSecondsAfterEmpty: 60
    ttlSecondsUntilExpired: 3600
  weight: 1
NodeClass
NodeClass holds infrastructure and credentials. It's the "how do we talk to this cloud and how do we join the cluster?" config.
A NodeClass can have configuration for one or more providers. For GCP you'd set project and zone (and optionally image family). For Hetzner you'd set location and a reference to a secret that holds the API token. For AWS you'd set region, AMI, and optional subnet and security groups. For Azure you'd set subscription, resource group, location, subnet ID, and a secret reference for the service principal. And so on for Scaleway, DigitalOcean, OVH. You don't have to fill every provider; only the ones you allow in your NodePools.
Join config is shared: the address of the control plane (typically a Tailscale IP and port, e.g. https://100.x.x.x:6443) and a token TTL for kubeadm join. Tailscale gets a reference to a secret that holds the auth key so the VM can join your tailnet. Bootstrap specifies the Kubernetes version to install on the VM.
The Autoscaler matches NodeClass to the provider CloudBroker recommended. If CloudBroker says "use Hetzner," the controller finds a NodeClass that has Hetzner config and uses that. You can have multiple NodeClasses — e.g. one for GCP, one for Hetzner — and the controller picks the one that fits.
Example NodeClass (Scaleway) and credentials secret:
apiVersion: cloudburst.io/v1alpha1
kind: NodeClass
metadata:
  name: scaleway-nodeclass
  namespace: default
spec:
  scaleway:
    zone: "fr-par-1"
    projectID: "your-scaleway-project-id"
    image: "ubuntu_jammy"
    apiKeySecretRef:
      name: scaleway-credentials
      key: SCW_SECRET_KEY
  join:
    hostApiServer: "https://<HOST_TAILSCALE_IP>:6443"
    kindClusterName: "cloudburst"
    tokenTtlMinutes: 60
  tailscale:
    authKeySecretRef:
      name: tailscale-auth
      key: authkey
  bootstrap:
    kubernetesVersion: "1.34.3"
Replace <HOST_TAILSCALE_IP> with your control plane's Tailscale IP. Create a separate secret tailscale-auth with key authkey for the Tailscale auth key.
NodeClaim
NodeClaim is one provisioned node. The Autoscaler creates it; the Autoscaler deletes it. Users don't create or edit NodeClaims.
Each NodeClaim has a status that moves through phases. Pending: recommendation received, not yet provisioned. Provisioning: VM creation in progress. Joining: VM is up, bootstrap is running, waiting for the node to report Ready. Ready: node is part of the cluster and can run pods. Deleting: cordon, drain, delete node object, delete VM.
The same name is used for the NodeClaim, the Kubernetes Node, and the cloud VM (with a cb- prefix for Cloudburst-managed resources). So you can correlate logs and dashboards: the NodeClaim cb-burst-pool-x7kq2 is the node cb-burst-pool-x7kq2 is the VM cb-burst-pool-x7kq2.
Inspect resources (Autoscaler creates NodeClaims; you create NodePools and NodeClasses):
kubectl get nodepools
kubectl get nodeclasses
kubectl get nodeclaims
kubectl get nodeclaims -o wide   # includes status phase
How they connect
The chain is: pod goes pending → Autoscaler calculates demand → calls CloudBroker with the NodePool's allowed providers and constraints (max price, region, etc.) → CloudBroker returns provider X, region Y, instance type Z → Autoscaler finds a NodeClass that supports X → creates a NodeClaim with that NodeClass and the recommended instance/region → provisions the VM, injects the bootstrap script, waits for join → node is Ready → pod is scheduled. Policy (NodePool) and infrastructure (NodeClass) are defined by you. The NodeClaim and the VM lifecycle are fully automatic.
With the interface clear, the final piece is scope, limits, and how to run the Autoscaler.